Transform Your Curb Appeal: A Step-by-Step Guide to Installing a Stunning #57 Stone Driveway
Are you looking to upgrade your home’s exterior and boost curb appeal? A #57 stone driveway installation can do just that. With its natural charm and rugged texture, this material offers beauty and long-lasting performance. A #57 stone driveway doesn’t just look good—it increases property value and supports better drainage too.
Though the process may seem complex, it’s entirely manageable with the right tools and preparation. This guide breaks everything down into simple steps. Whether you’re an experienced DIYer or just getting started, you’ll find helpful insights here. We’ll cover planning, installation, tools, and maintenance to help you succeed.
With some time and effort, your new driveway will enhance your home’s appearance. More importantly, it will stand the test of time. Let’s walk through the process of creating a beautiful and durable #57 stone driveway together.
What is #57 Stone and Why Choose It?
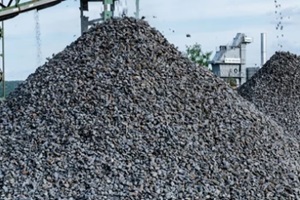
#57 stone is a type of crushed rock, usually granite, sized at about ¾ inch in diameter. This size makes it ideal for driveways. It compacts well, drains easily, and provides a clean finish. These stones vary in color from gray and blue to tan, blending nicely with most landscapes.
Many homeowners choose #57 stone because of its durability and aesthetic value. Unlike plain concrete or blacktop, stone driveways offer natural texture and color. This rustic yet refined appearance adds a custom touch to your home’s exterior.
Another big benefit is drainage. #57 stone is permeable, so water flows through rather than pooling. This reduces erosion and helps manage runoff. That makes it both functional and environmentally friendly. Combined with its low maintenance needs, this stone becomes a smart choice for any driveway.
Planning Your Driveway Installation: Key Considerations
Before breaking ground, map out the area where your new driveway will go. Make sure to consider space for parking, turning, and walking. Always check for underground utilities and follow local zoning or permit rules. Getting approval beforehand avoids problems later.
Next, estimate your budget. Costs can vary depending on the size of the area, local stone prices, and tool rental. Measure the driveway length and width. Multiply by the depth to figure out how much #57 stone you’ll need. Most driveways need 4–6 inches of stone.
Also, think about long-term care. Planning now helps prevent future issues. Will you need edging or drainage pipes? Will the driveway connect to a garage or road? Asking these questions early helps make your #57 stone driveway installation smooth and successful.
Tools and Materials Needed for Installation
For your project, you’ll need a few basic tools. These include a shovel, steel rake, wheelbarrow, and a tamper or plate compactor. If you don’t own them, many home centers rent them by the hour or day.
The main material is #57 stone. You may also need a base layer of crushed gravel. Landscape fabric is helpful too. It prevents weeds and allows water to drain through. Don’t forget edging materials like metal, wood, or plastic strips to keep the stone in place.
Other optional items include drainage piping and landscape staples for the fabric. Gather everything before starting. That way, the installation moves quickly and stays organized. Having all your tools and supplies in place makes a big difference in your results.
Preparing the Site for Your #57 Stone Driveway
Mark the shape of your driveway with stakes and string. This gives you clear visual lines for
digging. Use a shovel or excavator to dig out grass, roots, and topsoil to a depth of 8–12 inches.
Next, lay down the base. Spread 4–6 inches of crushed gravel across the excavated area. Use a rake to even it out. Then, compact the layer using your tamper or compactor. A solid base helps prevent future sinking or shifting.
After compacting, lay down landscape fabric. This keeps weeds from growing through and helps water drain efficiently. Cut the fabric to fit your space and hold it in place with staples. With these steps complete, you’re ready for the stone.
Step-by-Step Installation Process
Start by adding the #57 stone in layers. Use a wheelbarrow to move the material, then spread it with a shovel. Aim for an even depth across the entire driveway.
Next, use a rake to level the stone. Take your time to smooth the surface and fill low spots. Once it looks even, compact the surface. Use a tamper or plate compactor to press the stone into place.
Inspect your work after compacting. The stone should be level and solid. If you’re using edging, install it now to keep everything in place. Once complete, your new driveway is ready for use. It should look clean, natural, and professional.
Maintenance Tips for Your #57 Stone Driveway
Maintaining a #57 stone driveway is simple. Rake the surface now and then to keep the stones level. If you see dips or gaps, fill them with more stone and compact again.
Weeds can occasionally pop up. Pull them out or spot-treat with a weed killer. Keeping weeds in check helps preserve the clean look of the driveway. Landscape fabric reduces weed growth, but regular maintenance is still helpful.
Over time, your driveway may settle. Add a fresh layer of #57 stone every few years to maintain depth and appearance. With occasional upkeep, your driveway will stay functional and beautiful for years to come.
Enhancing Your Driveway with Landscaping Ideas
Now that your driveway is in place, consider adding curb appeal with landscaping. Planting flowers or shrubs along the edge creates a warm, inviting border. Choose low-maintenance plants that thrive in your area.
Adding solar lights improves both safety and appearance. Position them evenly along the edge for a clean look. They’ll light the way at night and boost your home’s charm.
You can also add decorative elements like potted plants, statues, or stone borders. These little details turn your driveway into a focal point. With a few thoughtful touches, your #57 stone driveway will stand out in the best way.
Common Mistakes to Avoid During Installation
Avoid rushing through site prep. A weak base layer leads to uneven surfaces and future repairs. Take the time to excavate and compact properly.
Don’t skip compacting the stone. This step locks everything in place and prevents shifting under your vehicle’s weight. Uneven spreading causes dips that hold water, so always level the stone carefully.
Lastly, don’t ignore maintenance. Even durable driveways need light upkeep. Fix issues early to avoid major problems later. Avoiding these mistakes ensures your #57 stone driveway installation delivers long-term beauty and function.
Conclusion: Enjoying Your New Curb Appeal
A well-installed #57 stone driveway can transform your home’s exterior. It adds charm, structure, and function. With the right tools and steps, this project is very doable for most homeowners.
You’ve now learned how to plan, install, and maintain a stone driveway with confidence. Take pride in your hard work. A clean, professional-looking driveway boosts your home’s value and makes a great impression.
Whether you’re improving for resale or personal enjoyment, this is an investment that pays off. Enjoy the compliments—and the satisfaction—of completing a job well done.
High-Volume Dirt Delivery, Hauling & Full-Service Construction—We Get It Done Right
Get gravel, screened fill dirt, grading, and dump truck hauling in Virginia and Maryland. In fact, this team specializes in high-volume dirt delivery, construction site preparation, and bulk material transport. Whether you need backfill after pool removal, driveway grading, or foundation pad creation, they’ve got you covered. Plus, they deliver clean, compactable fill with fast, reliable service and fair pricing. So, order online now for dirt delivery in Fairfax, Arlington, Alexandria, Rockville, and nearby areas. To get started, simply call 703-940-9949 or visit DirtConnections.com.
Summary

Dirt Connections was started with one goal in mind: providing quality residential and commercial construction services to clients on time and on budget. Reach out for more information on how we can support your next project.
For your convenience our estimates are free and by appointment. Call 703-940-9949 for a free estimate today!


